When it comes to working with electrical systems, understanding how to connect a dry type transformer is crucial. Dry type transformers are commonly used in commercial and industrial applications due to their safety and efficiency. Unlike their oil-filled counterparts, these transformers use air as a cooling medium, making them environmentally friendly and easy to maintain. In this guide, we will walk you through the process of connecting a dry type transformer, ensuring you understand the wiring and installation steps involved.

Before diving into the connection process, it’s essential to have a basic understanding of dry type transformers. These transformers work by transferring electrical energy between two or more circuits through electromagnetic induction. They are typically used to step up or step down voltage levels in power distribution systems.
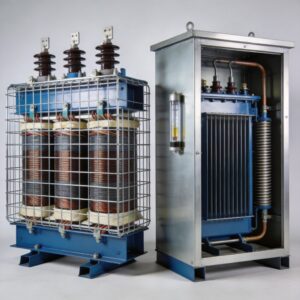
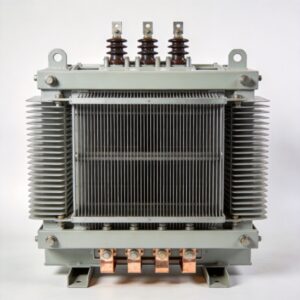
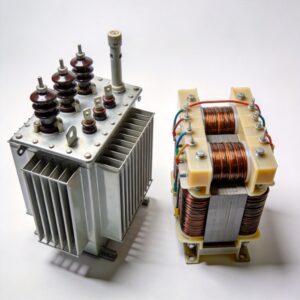
Components of a Dry Type Transformer
A dry type transformer consists of several key components:
- Core: The core is made of laminated steel sheets and serves as the pathway for magnetic flux.
- Windings: These are copper or aluminum coils wound around the core. There are usually two sets of windings: primary and secondary.
- Insulation: High-quality insulation is used to separate the windings and prevent electrical shorts.
- Enclosure: The enclosure protects the internal components and can be ventilated or sealed, depending on the application.
Transformer Wiring Guide

To ensure safe and efficient operation, it’s crucial to follow a specific wiring guide when connecting a dry type transformer. Here’s a step-by-step process:
Step 1: Safety First
Before starting any electrical work, always ensure the power is turned off. Use a voltage tester to verify that there is no electrical current in the wires you’ll be working with. Wear appropriate personal protective equipment (PPE) such as insulated gloves and safety goggles.
Step 2: Understanding the Connection Types
Dry type transformers can be connected in different ways, depending on the application. The most common transformer connection types are:
- Delta-Delta (Δ-Δ): Used primarily for industrial applications where high power is required.
- Delta-Wye (Δ-Y): Commonly used in distribution systems to reduce voltage levels.
- Wye-Wye (Y-Y): Often used in transmission systems to distribute power over long distances.
Each connection type has its own set of advantages and is chosen based on the specific requirements of the electrical system.
Step 3: Identifying Primary and Secondary Windings
The primary winding is connected to the power source, while the secondary winding is connected to the load. It’s essential to identify these windings before proceeding with the connection. The transformer’s nameplate usually provides information on the voltage ratings for the primary and secondary windings.
Step 4: Wiring the Primary and Secondary Connections
Primary Connections
- Identify the Primary Terminals: These are typically labeled as H1, H2, H3, etc., depending on the number of phases.
- Connect to the Power Source: Use appropriate gauge wire to connect the primary terminals to the incoming power supply. Ensure that the connections are tight and secure.
Secondary Connections
- Identify the Secondary Terminals: These are usually labeled as X1, X2, X3, etc.
- Connect to the Load: Use suitable gauge wire to connect the secondary terminals to the load or distribution panel. Again, ensure that all connections are tight.
Step 5: Grounding the Transformer
Proper grounding is essential for safety and to prevent electrical faults. Connect the transformer’s grounding terminal to the building’s grounding system. This step helps protect both the equipment and personnel from electrical shocks.
Step 6: Testing and Commissioning
After completing the wiring connections, it’s crucial to test the transformer before putting it into operation. Here are the steps to follow:
- Insulation Resistance Test: Use a megohmmeter to test the insulation resistance of the windings. This test helps identify any potential insulation failures.
- Polarity Check: Ensure that the connections have the correct polarity to avoid phase imbalances.
- Voltage Test: Verify that the secondary voltage matches the expected output level.
- Load Test: Gradually apply load to the transformer while monitoring for any unusual noises or temperature rise.
Troubleshooting Common Issues
Even with careful installation, issues can sometimes arise. Here are some common problems and their solutions:
- Overheating: Ensure proper ventilation around the transformer and check for any obstructions that might impede airflow.
- Noise: Tighten any loose components and check for signs of mechanical vibration.
- Voltage Fluctuations: Verify that all connections are secure and that the power supply is stable.
Conclusion
Connecting a dry type transformer requires attention to detail and adherence to safety standards. By following this transformer wiring guide, you can ensure a successful installation and reliable operation. Remember to consult the manufacturer’s instructions and local electrical codes for specific requirements related to your application.
Whether you’re a seasoned electrician or a DIY enthusiast, understanding how to connect a dry type transformer is a valuable skill that can enhance your electrical projects. With the right knowledge and tools, you can safely and efficiently bring your transformer online, delivering power where it’s needed.